See Assembly sequence
animation
Panel Assembly
A Start from Panel Assy. means you have acquired the "ready to assemble" Kit of panels and structural components customized to your home project. You start to assemble the panels as seen in the background of this page. Each component is precision manufactured to fit assemble. A set of cad graphics and instructions are provided for guidance. All you have to do is follow simple instructions and enjoy the assembling game.
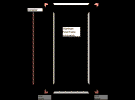
To assemble an individual panel you start by gathering the 4 structural components flat on the floor, insert the 8 corner squares after placing the reinforcing mesh inside the panel, set screws and you are ready for the next panel.
There are no possible
mistakes.If it doesn't
belong it doesn't fit, simple as that.
There are some special panels that require a little
more work, the service
panels and window panels
in which some extra components have to be fitted
inside them.
Elect.
service panels
come specified and
are fitted
with conduits, switch and power outlet boxes.
This is a section of a
standard side p-service
panel showing section of steel tubular tie beams
IPN roof structure and reinforced concrete roof
filling material. Conduit pipes and boxes are
embedded in concrete, showing for demonstration
purposes only.
Window
panels have to be fitted with
window framings.
A
example of a gable panel frame showing
steel mesh cut to fit in a window frame before
casting foamed concrete. Panels
can be shaped
to accommodate all types of windows.
Large windows can be shared by several panels.
Once the pa nels
are
assembled,
you are ready for the next step, Installation.
(c


